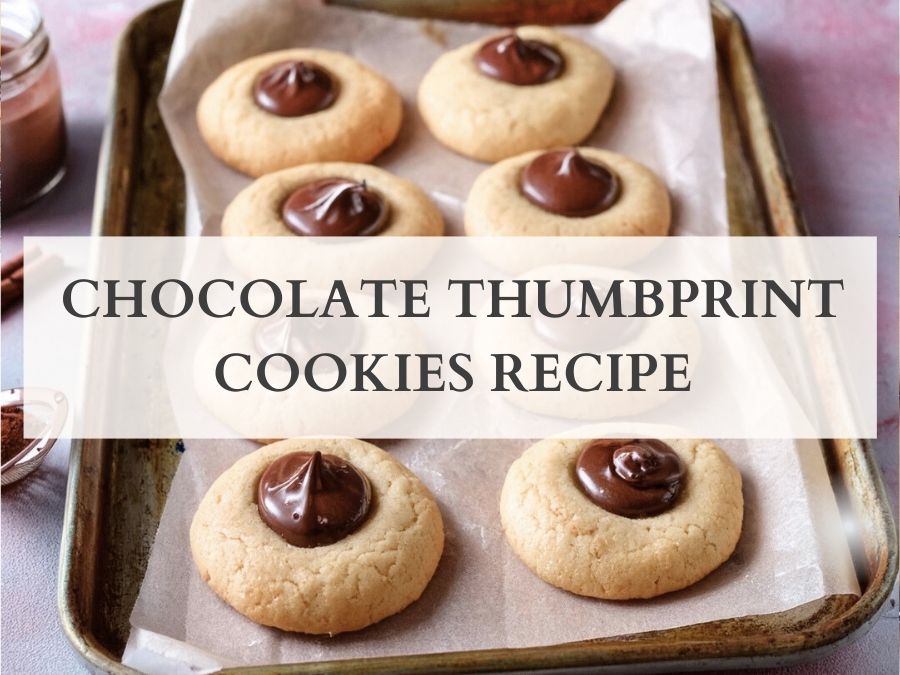
I bet you were looking for this type of cookies to bake during this time of the year again. Oh yeah chocolate thumbprint cookies made with chocolate ganache. This thumbprint cookies recipe is the one, and if you try, you will just call yours recipe to-go. It is just perfect to have with that coffee, yummy! Here it basically became a tradition. As a foodie person, I like baking them for gifting also. These thumbprint cookies are so versatile. You can bake from chocolate thumbprint cookies to raspberry thumbprint cookies. They are so requested, simply because everybody loves them so much! The best part? They’re so easy to make, and I’m just really excited to share this recipe with all of you today.
This post is all about a chocolate thumbprint cookies recipe
Ingredients
Wet Ingredients
For the thumbprint cookies
- Unsalted butter, softened at room temperature, but not too soft
- 2 large egg yolks
- 1 teaspoon vanilla extract, or ¼ teaspoon almond extract if you like the slightest hint of almond flavor
For the ganache
- 8 oz (about 1 cup) semi-sweet or dark chocolate, finely chopped
- ½ cup heavy cream
- 1 tablespoon unsalted butter, at room temperature
Dry Ingredients
- 2 cups all-purpose flour
- ¼ teaspoon salt
Filling
- Ganache
- Other sugestions: Raspberry jam, seeds and all, though you can use fig or apricot or any flavor you are in the mood for
- Powdered sugar, for dusting if you feel like it (Optional)
Instructions
I like to make these cookies in my standing mixer, but you can very easily mix them by hand if you prefer. Start with some softened, at room temperature, unsalted butter. I had mine on the stove earlier. It started to melt a little, so I had to move it away. So in your mixer, fitted with a paddle attachment, add your softened butter and sugar.
Now, lift off the mixer and cream the butter and sugar together until it doesn’t exist anymore. You don’t want it to whip too much; you just sort of want it to come together so it’s really smooth. A minute on medium should do it. Make sure to scrape down the sides occasionally so everything gets nice and incorporated in there. You don’t want any little chunks of butter remaining!
Now, add in the egg yolks and vanilla extract. I have been baking these cookies for years, and yes, I do mix the flavors up at times based on what else is on my cookie platter. This year, I’m doing Italian rainbow cookies that pack a big punch of almond, so I’m keeping it vanilla in the thumbprints to keep things balanced. However, if you’re not making almond-flavored cookies for your tray, you can use ¼ teaspoon of almond extract instead of vanilla for a light taste of almond. Mix for another 30 seconds to 1 minute until combined. If it looks split, do not freak out—just scrape it down and keep going.
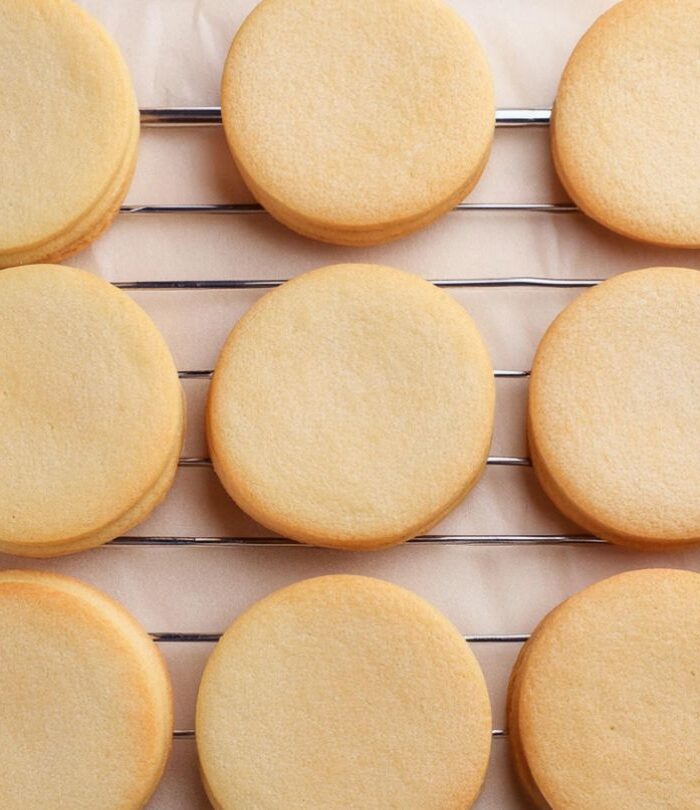
Now, add salt and flour to the mixture and mix until everything comes together. The dough should be stiff but still pliable—exactly how you want it to be.
Forming the Cookies
Take a big cookie sheet lined with parchment paper. Using a 1-tablespoon measure or cookie scoop, scoop the dough and place it on the baking sheet. Once you have scooped all the dough, take each piece and roll between your hands until they are nice and smooth.
Now, take this half-teaspoon measuring spoon and just dip it in the flour—so it doesn’t stick—and gently press into the middle of each dough ball. Perfect spot for your ganache. You can use your thumb if you want to, but I find that the spoon gives a more even result.
After shaping and pressing, place the entire baking sheet into the freezer for about 20 minutes. This step is important, as it helps the cookies hold their shape and prevents them from spreading too much in the oven.
Instructions for the chocolate ganache
While the cookies are in the freezer, you can make the chocolate ganache.
- Chop the Chocolate:
- Start by chopping the chocolate into small bits and put them in a bowl. The smaller, the better!
- Heat the Cream:
- Pour the cream into a small pot and heat it up on medium. Keep an eye on it—when you see little bubbles around the edge, it’s ready. Super important here, don’t let it boil!
- Mix Cream with Chocolate:
- Pour the hot cream over the chopped chocolate. Let it sit for a couple of minutes so the chocolate starts to melt.
- Stir Until Smooth:
- After a few minutes, gently stir the chocolate and cream together until it’s super smooth and shiny. If it’s not smooth yet, keep stirring.
- Add Butter and Vanilla:
- Once it’s all mixed, add the butter and stir until it melts in. If you like, add a little vanilla for extra flavor.
- Let It Cool:
- Let the ganache cool down for a bit until it’s thick enough to spoon or pipe into the cookies—kind of like pudding. Set it aside and go back to the cookies = )
Bake the Cookies
While your cookies chill, preheat your oven to 350°F (175°C).
Once the dough is sufficiently cold, remove the sheet from the freezer. Then bake for 13 minutes. They should be firm but still very blonde when done—resist the urge to overbake! These cookies are meant to be buttery and tender, not hard.
Allow the cookies to cool on the baking sheet for a few minutes, then transfer to a wire rack. Here you can add the teaspoon of chocolate ganache. If desired, dust edges of the cookies with powdered sugar after they have cooled. It adds a nice touch of sweetness and makes them look extra festive, but they are absolutely fine without it.
One of the best things about this dough is that it freezes beautifully. If you are not planning to bake all of the cookies at one time, you can freeze the unbaked, shaped cookies after the thumbprints are made. Just store them in a large Ziploc bag in the freezer.
Then, when you are ready to bake some, place the frozen cookies on a baking sheet, fill with jam, and bake at 350°F for 15 minutes. Add 2 minutes to the original baking time, and they will turn out perfect every time. This definitely makes last-minute cookie trays pretty easy to do.
These yummy thumbprint cookies are an ideal foodie gift during holidays. Whether you enjoy them powdered with a little sugar or just as they are, these buttery, soft cookies are sure to become one of the greatest favorites among all.
If you liked this recipe, you may also love to know that we have more cookie recipes like this one and that they can be found in the Cookies sub-category under the RECIPES category. Happy baking!
Happy Baking and Happy Holidays!